1. Visit your stylist or barber beforehand: Usually we look our best when we have recently had a haircut. Don’t do a drastic change, you still want to look like YOU. Just have the stylist or barber clean up your look. If you have your hair colored, get the roots touched up. If you have a beard, don’t forget to have them tend to that as well so you will have a more defined jawline in your image. Going for the clean shaven look? Have your barber give you a close shave with a straight razor or bring a razor and shaving cream with you to the session to give yourself a shave right before the shoot. Make sure to use aftershave to cut down on skin irritation.
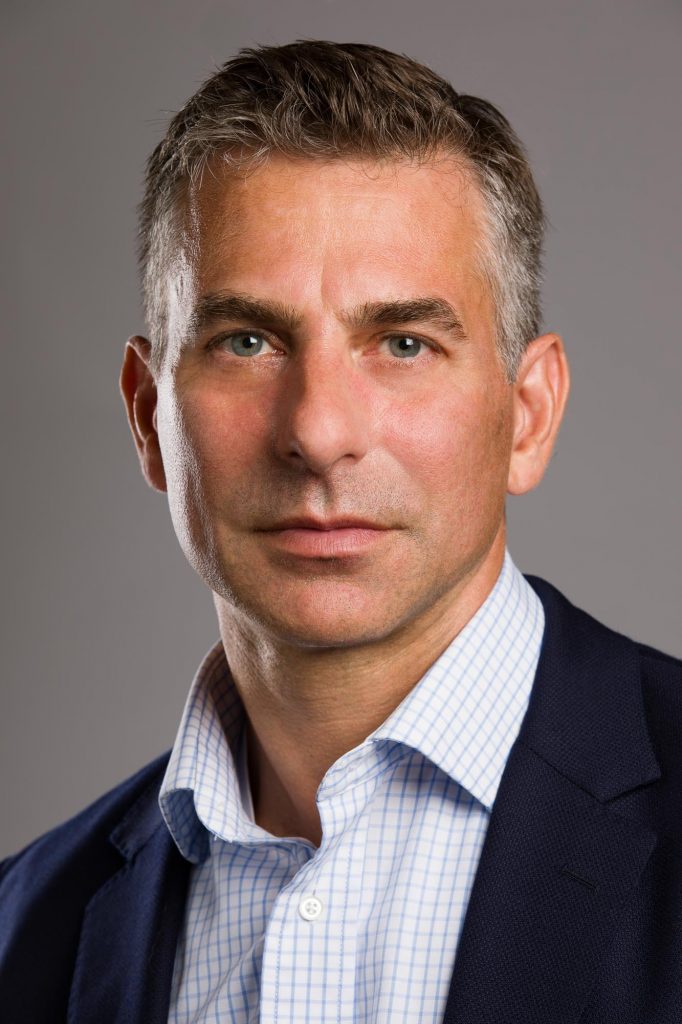
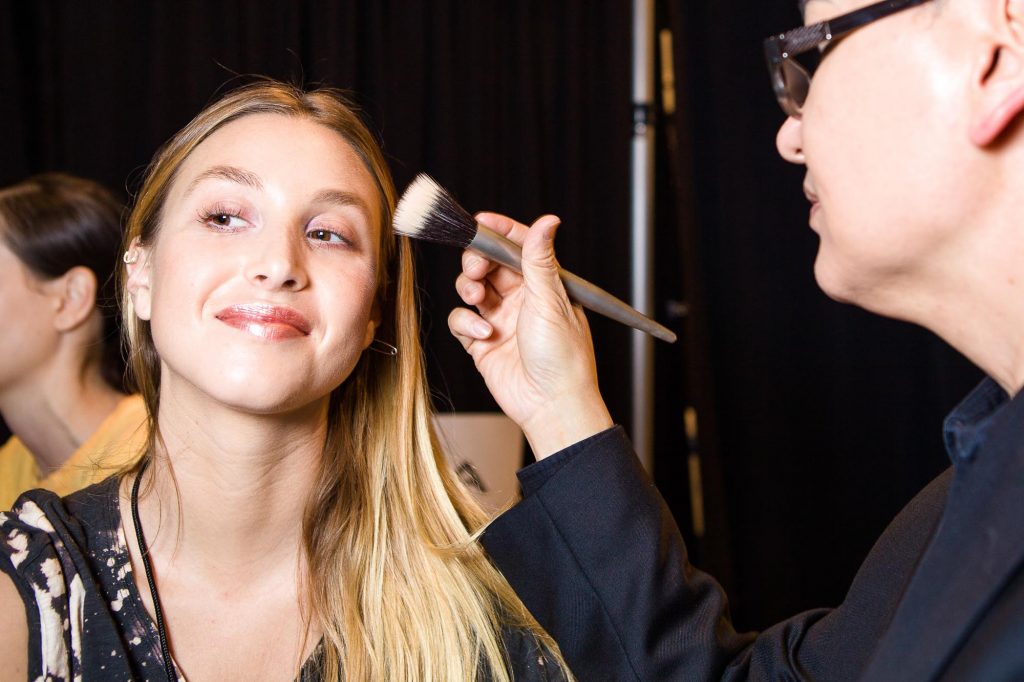
2. Hair and Makeup: Getting your hair and makeup done professionally at our studio is recommended. Photos are 2 dimensional, they are flat. In real life we see each other in 3 dimensions. Makeup in photos helps to give your face dimension and definition. It can also even out the appearance of ruddy skin and decrease how shiny or oily the skin looks. Even if you normally don’t wear any makeup on a day to day basis, a little goes a long way in a headshot. My hair and makeup artists specialize in headshot makeup. They ensure you look your best but keep you from looking too done up. They will stay the entirety of your shoot to make sure that every hair is in place and will touch up your makeup as necessary.
3. Tweezers, waxing, and threading are your friends. A few days before your session you should spend some quality time with a mirror and a set of tweezers to make sure that your eyebrows are well-shaped. If you are not comfortable doing it yourself, try going to your local salon to have your eyebrows waxed or threaded. You will be amazed at how this simple trick really makes your eyes pop in a photo. Do not tweeze or wax the morning of your session as you may end up with some redness and irritation that may not clear up in time for your photo.
One other area to check for hairs are your nose and ears. You do NOT want these fellas to make an appearance in your headshot! The Phillips Norelco nose hair trimmer can make the job much easier, it even does eyebrows. Be sure not to leave this until the morning before your session because you might have some temporary red irritation from plucking/trimming. If you aren’t comfortable doing this yourself, your local barber or salon can take care of it for you.
4. Bring Several Outfits With You and Have them Ironed or Dry Cleaned in Advance. Find out if there is a specific dress code you need to adhere to for your company or profession. On the day of your shoot you should bring several options for outfits with you. Bring at least one jacket with you for a more formal look. Leather jackets are fabulous too! Avoid busy prints and neon colors. The attention should be on your face, not on your clothes. Try on your outfits a few days before the shoot to make sure you are comfortable and confident in your choice of clothing. The outfits you bring in should fit you well. If you have gained weight or lost weight take this opportunity to get a few new pieces that fit you perfectly. Clothes that are too tight will restrict your movement while posing and ones that are too loose can make you look disheveled. Have the items cleaned and pressed or ironed so there are no wrinkles. Choose a shirt or dress that is not too low cut and that doesn’t risk showing your bra straps or chest hair. Avoid over accessorizing. Necklaces should not be too long or else they risk being cut off at the bottom of the frame of the image. Avoid sleeveless shirts, they take the attention away from your face. Long sleeves or 3/4 length sleeves are preferable. If you have any questions about what to wear, don’t hesitate to call or email Vail. She’ll be happy to discuss this with you in greater detail.
5. Avoid the dreaded double chin look. When people try to sit up straight they often drawn their chin in towards their neck. This gives them the look of a double chin. To fix this problem you just need to remember “chin forward and down.” This handy technique borrowed from the fashion industry (Tyra called it doing the turtle) will give you a defined jawline and get rid of the appearance of a double chin by engaging your neck muscles. The video below demonstrates how to do this. Practice it in the mirror a few days before your photo session to really get it down. It feels strange as you are doing it, but believe me, it looks great!
6. Try different smiles. Before your session try a variety of smiles in the mirror. Start with your traditional big picture smile, then switch it up to serious, then smile but with your mouth closed and no teeth showing at all. Then a little bit of teeth showing. Then a great big toothy grin. If you have a gap, or crooked or missing teeth, don’t be afraid to smile with your teeth showing. Vail knows different techniques to minimize attention on these areas while still maintaining the approachability that a full smile results in. By practicing these in the mirror beforehand you’ll get a sense of what you prefer and can focus on more during the session.


7. Talk to Vail before your shoot about your brand. Professional images are for your brand, so that means you are trying to communicate something specific. The clothes you pick to wear, the background for your image, your expression, and the lighting style all reflect on your brand and the way you will be perceived. Are you trying to look conservative? Edgy? Approachable? Powerful? Tell Vail what the photos are going to be used for. If it is for your website the color you pick for your background should work well with the color scheme of your site. It is always better to figure this out BEFORE your shoot instead of after.
8. In Person Image Review: At the end of your session we will review all your images together in the studio. My clients have found this method to work much better for them than being sent home with a big online gallery of all their images to review on their own computers or phones. I will review the images with you on my 27″ monitor with software designed for image selection and we will be able to cull them down to the very best ones quickly. We will discuss who your intended audience is for the images and how you want to be perceived. I will provide you with an objective professional analysis of your images because I am better suited to help you than your loved ones and friends. Your loved ones will always choose the most smiley pictures because it reminds them of the person they fell in love with. I am a facial expression coach that knows what impression your subtle micro-expression differences will have on the way the image is perceived by its intended audience. Helping you choose the best images is part of the value I provide you.